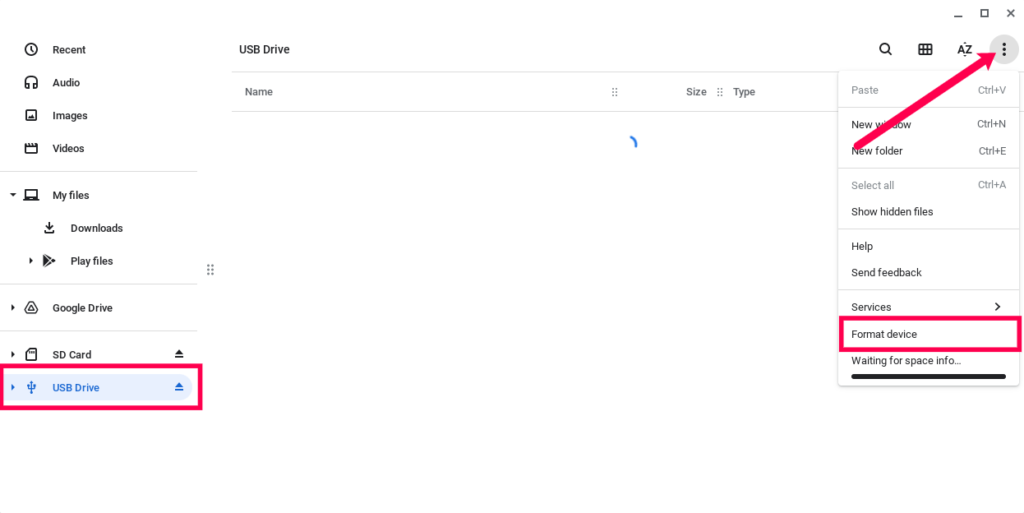
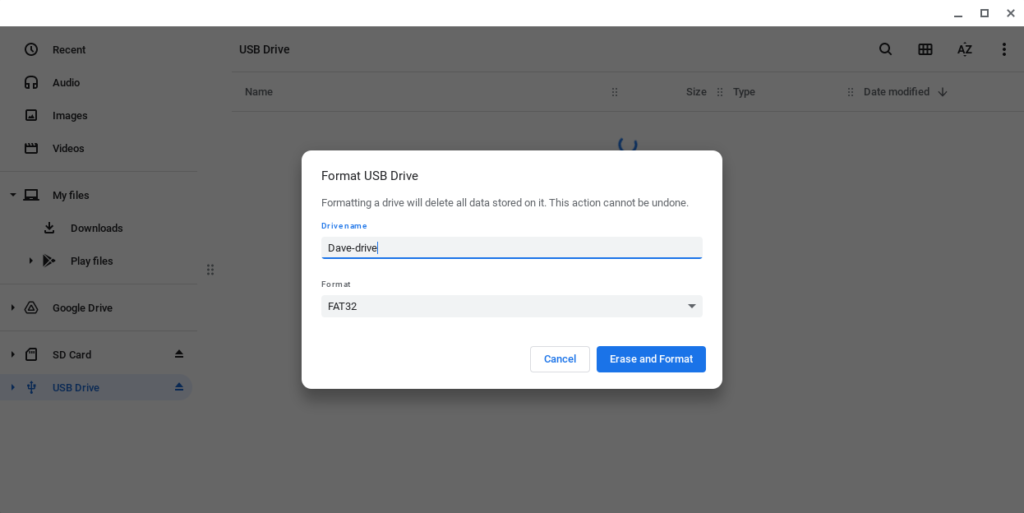
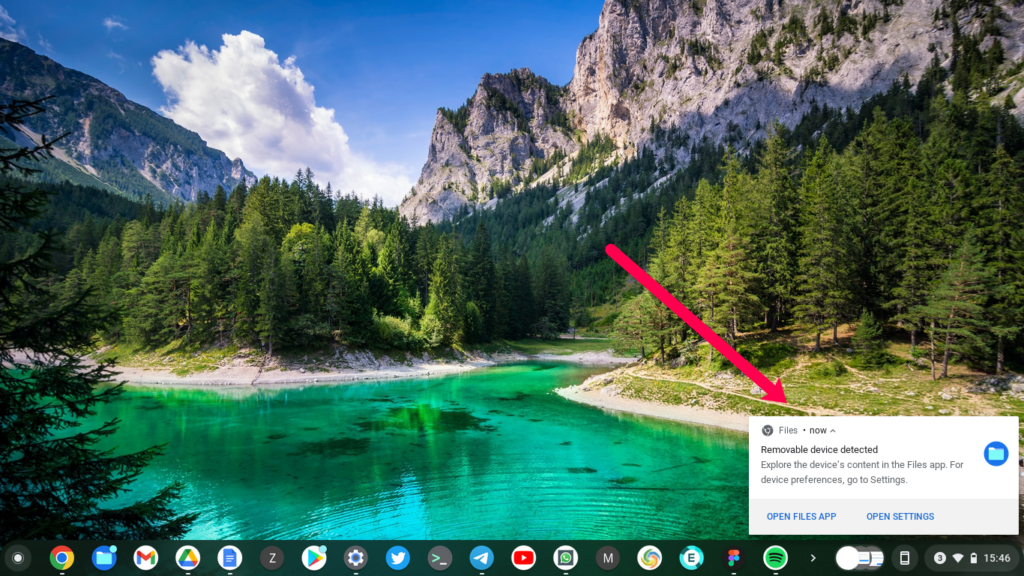
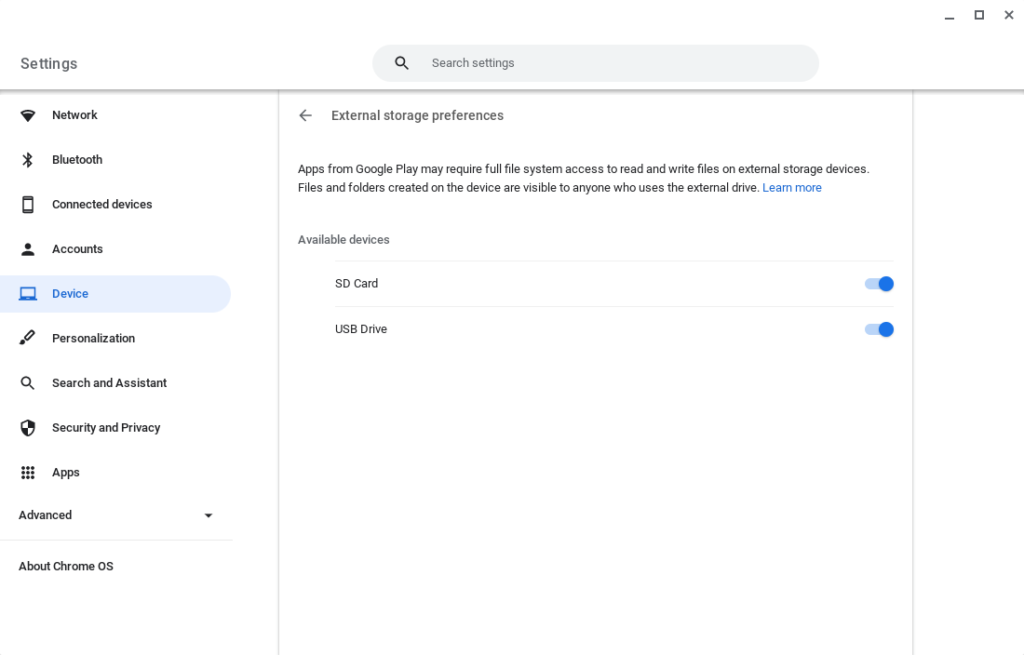
Before formatting your flash disk, you should decide on the file system you want to format your storage device in. However, the standard for microSD cards is FAT32 while flash disks and portable drives are usually formatted in exFAT or NTFS. FAT32 can only support up to 32GB partition in most operating systems and a single file can only support up to 4GB. exFAT and NTFS are alot more powerful than FAT32. Read more: exFAT, FAT32 or NTFS: Which one should you use to format your USB Flash disk? Before you format your external storage device on your Chromebook, first backup any valuable data on it. This is because everything on it is going to be completely erased. Now to format your USB drive or portable drive, plug it in through a compatible port. For instance, if it’s the big rectangular standard USB-A port, then plug it through one of the USB-A ports. If it’s the smaller reversible oval-shaped USB-C port, then use that instead. You might get a notification on the system tray prompting you to open the flash disk on the Files App. You could simply open the Files App. On the bottom left panel, click on USB Drive. Now click on the menu icon(3 vertical dots) on the Files App, and click on the Format device. You can enter the name you want to call your storage device as well as select the file system format. I recommend you select FAT 32 for microSD card or flash disk and NTFS if you have a bigger external hard drive or SSD portable drive. Chrome OS will now start formatting the external storage device. It usually takes between 1-3 minutes depending on how big your device is. You can now copy and move files from and to the USB drive using the Files App. You can now make the external storage device available to Apps. From Settings, click on Device > Storage management > External storage preferences and then turn access on and off. Here’s a Youtube Video tutorial we made on how to format your USB flash drive or microSD on your Chromebook. You can watch it below;


